I’ve been getting a lot of questions about using my digital resources and how to start using digital resources in the classroom, so I thought I would write a helpful step by step tutorial for those of you that are new to the world of paperless, and those that could use a little refresher.
Whether you are a seasoned veteran teacher, brand new to the classroom or somewhere in between, there’s one thing that never ceases to change. Technology. Once you get the hang of doing the “new thing,” along comes the next new thing. I know it can be exhausting and our gut reactions might tell us to not even bother because, who can keep up with it with the pace it changes? But, here’s the thing. Your students need to be familiar with technology, and there’s absolutely no harm in learning along with them. The one thing I consistently notice about teachers hesitating to use digital resources is they are afraid to mess up. Afraid they won’t know how to do something, and they’ll be stuck trying to figure it out while the class is sitting there waiting. They are afraid they’ll look dumb, or not knowing everything about what they are trying will make their students think differently of them. My answer to that is to not take it so seriously, and to think about how you would treat a student that felt that way. You wouldn’t suggest they give up. You would tell them to keep trying, and not to care what people around them think. Learning new things doesn’t come easy, and students can really benefit from seeing an adult they admire learn a new skill and not be perfect at it. Trust me. Don’t wait until it’s pressure time and you need the technology resource for a specific time period. Try using digital resources in a more random manner so the pressure to get it right the first time isn’t there.

So, first up. You may have heard of Google Classroom. Or maybe you already have it, tried it out at some random inservice or training, and then forgot about it. TIME TO GET BACK ON THE HORSE. Many digital resources are PowerPoint files, which means they can be used on Google Classroom and students can each have their own copy to work on (and it will save the copy where they left off). If you have a handful of devices (Chromebooks, iPads, laptops, etc.), I highly recommend getting yourself set up with Google Classroom.
Google Classroom Setup
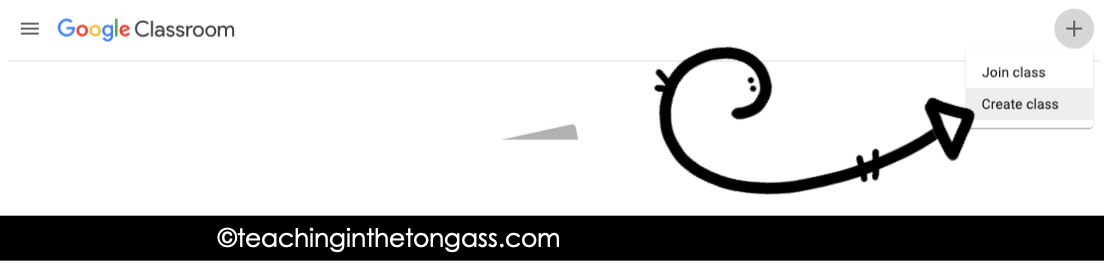
- Go to classroom.google.com and click the + button and CREATE CLASS. Name your class and click CREATE.

- Under your name, click the CLASS CODE so your students can view and enter the class code and join the class on classroom.google.com or on the Google Classroom App (your code will not be the same as the code shown below—that’s just the class code I’m using for these instructions). If you are teaching remotely and do not have your students already in Google Classroom, provide students with the website (classroom.google.com) or the app and the code for them to join the class (for primary students, they’ll likely need the help of an adult for this step).

- After students enter the code, they’ll be listed in your class under your Students and will be able to see any work you ASSIGN now.

The easiest way to try this out for yourself is to have a file ready for you in Google Classroom, so I’ve created a Distance Learning Lesson Template for you to add to your Google Classroom and try out. So, if you need something to test out, download the template really quick and come back here to read the next steps.

Giving Students An Assignment in Google Classroom
- Click CLASSWORK, then CREATE and choose ASSIGNMENT.


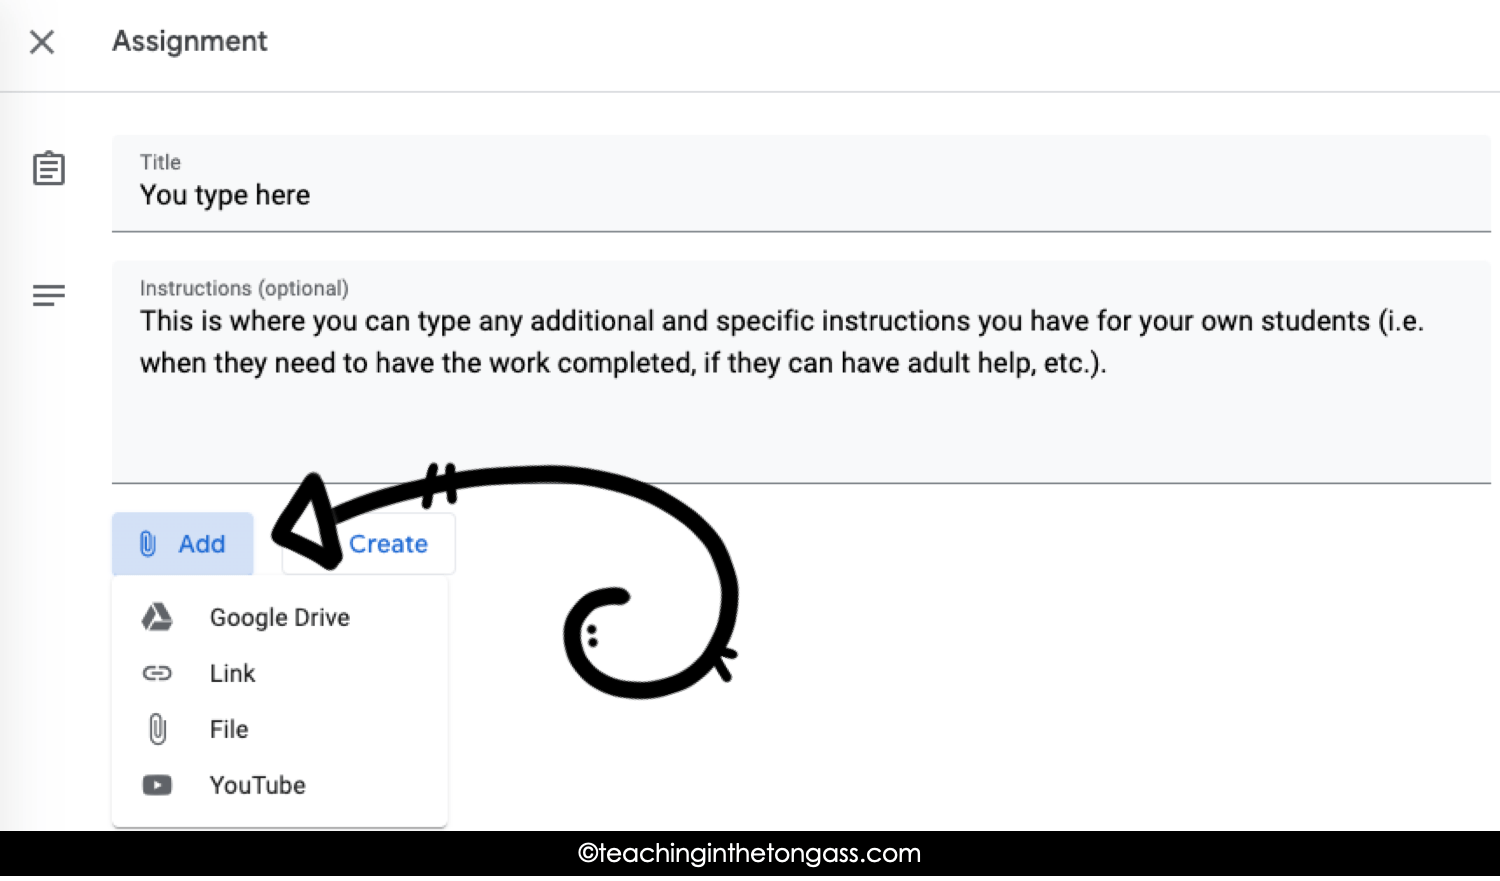
- Give your assignment a Title and Description. Click ADD and find the file you want to use and double-click it. If it’s not in your Google Drive already, go to Upload and upload it from wherever you saved it to when you first downloaded it.

- Select MAKE A COPY FOR EACH STUDENT in order to provide each student with their own file.
 If you don’t want to assign all of the slides, first you need to open the file in Google Slides, choose the slide(s) you want to use, then you need to go to File–>Make a Copy–>Selected slides.
- Select ASSIGN in order to provide each student with their own file to work on.

- Students will now have access to their own individual file to work on in their Classwork tab, and you will be able to view their completed work on the file on your end when you are logged in to your own account.


Moveable Pieces
Once you begin using a digital resource, there are a couple of things that you might discover if you’ve never used a Powerpoint or Google Slides activity with moveable pieces (the little drag and drop objects). Some of the pieces are moveable so students can drag them to the top area to solve the problem. Unfortunately, PowerPoint and Google do not allow you to move objects while you are in “Present” mode, so students moving pieces will always see the slides on the left (this is referred to as “Edit” mode).
If you want to create more than one moveable piece, click on the piece, then go to EDIT, then COPY, then PASTE.
First, in order for students to move the pieces with their fingers (this is for if they are using an iPad), you’ll need to take a few minutes to explicitly teach them to TAP, LET GO, and then SLIDE the piece to move it. Powerpoint and Google Slides aren’t like the average app where you can just click an object and slide to move it in the same moment (unfortunately). Have students practice moving pieces so they get the hang of that action.
 Second, there is no way to “lock” the size of a moveable piece, so they are sometimes resized by accident when students don’t tap/swipe correctly. Spend some time explicitly teaching them how to use the UNDO option (back arrow) that looks something like this (depending on which version you are using).


Using Digital Resources on an iPad
If you are going to use a digital resource on an iPad, you’ll need an app to open it. You can search for and download the Slides app or the PowerPoint app from the App store. If you are using Google Classroom, download the Google Classroom app if you plan on assigning files to students so they can work on their own copy on an iPad. All three of these apps are free.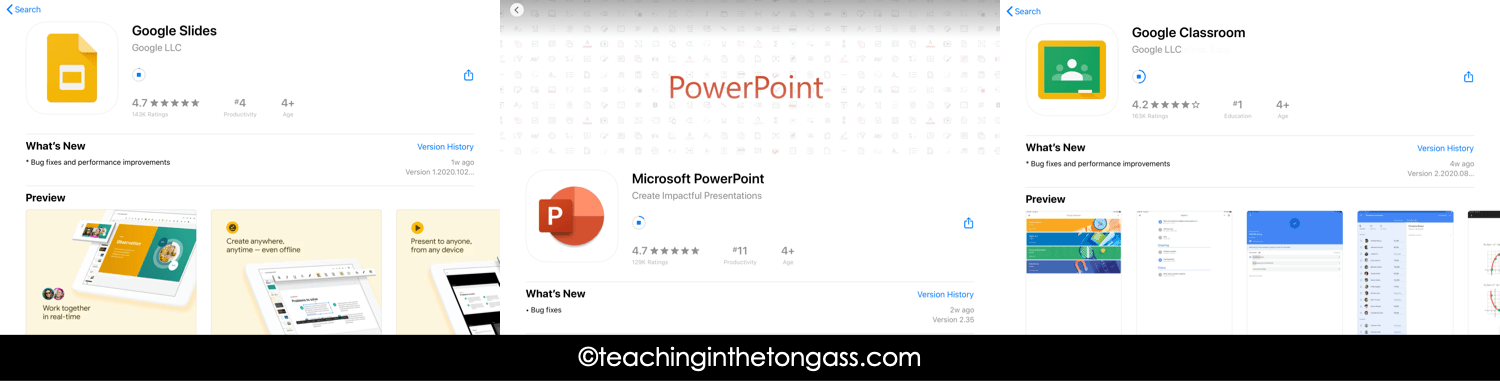 You can add the digital resource to PowerPoint via iTunes or AirDrop. Everyone’s process for this is different depending on what system and version they are using, and technology changes so quickly that it’s difficult to provide a tutorial that I won’t need to update regularly. So, if you need help with accessing the digital resource on your app, I highly recommend that you email [email protected] and someone from the tech team will help you troubleshoot.
I hope this helps you in getting started with using digital resources with your own students. Don’t be afraid to jump in and just start trying things–and remember, you don’t need to be a technology expert or Google Classroom whiz before you start using it! The more times you use it, the more intuitive it will become and easier for your students as well.
I wanted to showcase some of my favorite digital tools and resources and Google classroom activities for going digital with your class, so that’s what today’s blog post is all about. All of these activities can be used in either PowerPoint or Google Slides, on a computer or on an iPad or tablet, whichever you already have.
Digital Classroom Management
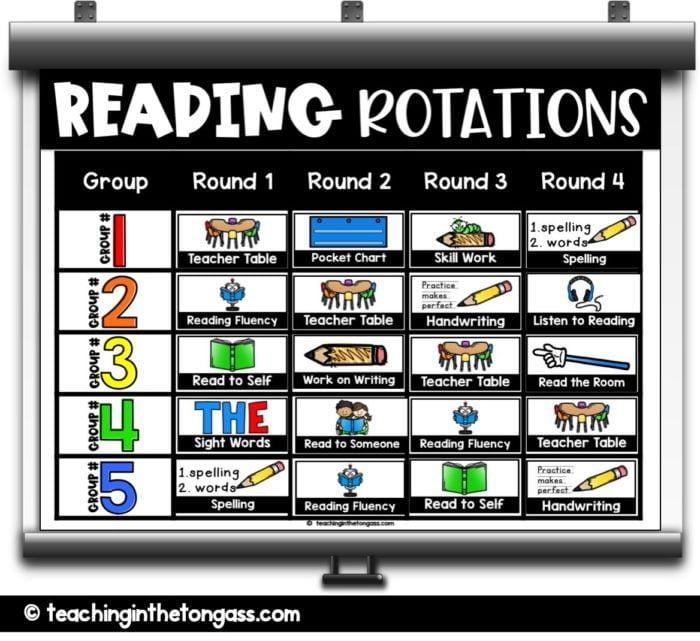 These Digital Center Rotation Charts will revolutionize how you manage your centers. I’ve included literacy, math and miscellaneous center cards (digital, moveable pieces) to choose from, and the amount of groups and rotations is editable (you can add as many rows and columns as you need). There is also a slide for organizing your groups by number or color (you can also easily add your own graphics–like animals–if you prefer to name your groups something else). You can display the slide that has all the centers on it like this, or each round at a single time with a clean up slide in between (it has countdown timers to make it even easier). The whole thing takes minutes to set up and makes changing out your digital rotation board a breeze.
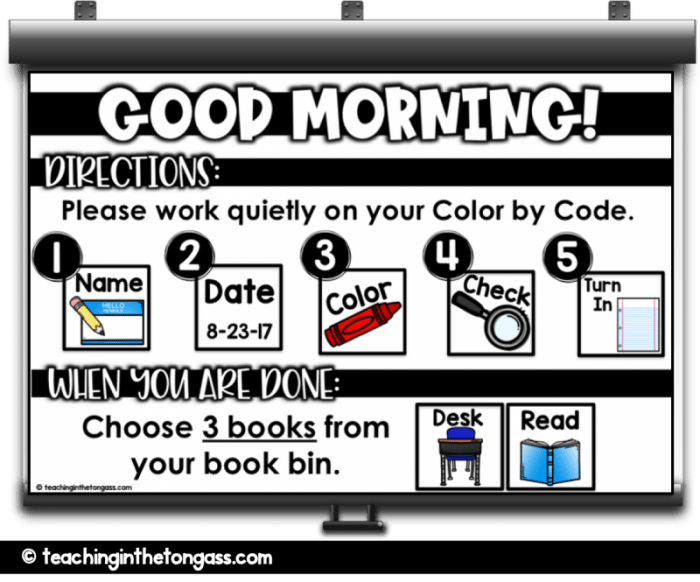
These Digital Visual Directions take the constant guessing game out of the equation. Just in case, “What do I do next?” isn’t your favorite question. This digital resource come with all kinds of different slides to choose from (so you can use them for morning routines, subject areas, after recess, etc.). And they of course come with tons of moveable direction cards and number cards so you can make them really work for your own needs. You can type right on the slide as well.
 Raise your hand if you’ve used a marble jar for improving behavior. Digital Class Rewards are the same concept, but with a digital twist. This set of slides can be used with Google Classroom or Powerpoint, and includes tons of choices, from building a pizza to earn a reward, to filling a popcorn bowl to earn, well I would guess a popcorn party but you could have the goal be whatever you like. You can copy and paste as many of the moveable pieces as you need, so if you want your students to start off with only earning 10 pieces at the beginning of the year, and then later on in the year, your expectations are for 20 pieces, you can do that. You can use them for all kinds of things like perfect attendance, quieting your class down, walking down the hallway perfectly, getting in line quickly, all homework turned in…so many possibilities with this one. I’ve got a free one you can try with your class to see if you like it!
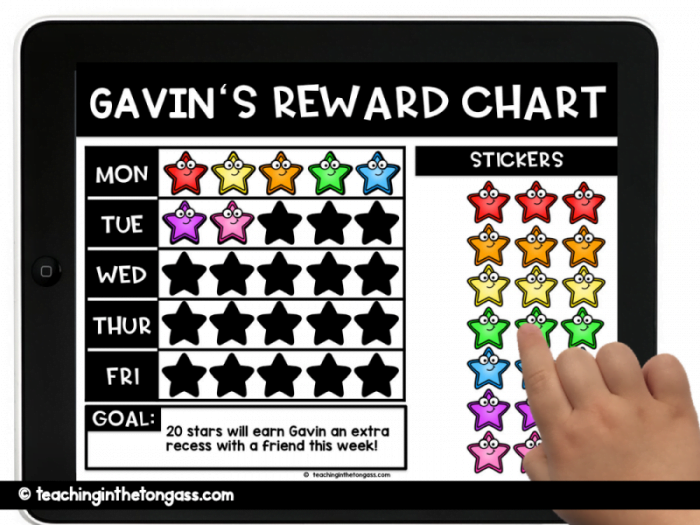 Confession: I don’t like sticker charts. I know, I know, I’m terrible. I just can’t keep it together enough to a)not lose the stickers that are for the chart and b)remember to actually add them to the little piece of paper chart. Enter the Digital Student Reward Chart. These are really cool for individual students because they also work on tablets (like an iPad) and iPhones. So, if you have a student that is working toward a specific goal, you can use this reward chart to monitor their progress and it can easily go with them throughout the day. Students can move the stars (it also comes with an emoji option) into the table (there are tons of other slide options, so you can do by subject area as well as by day of the week).
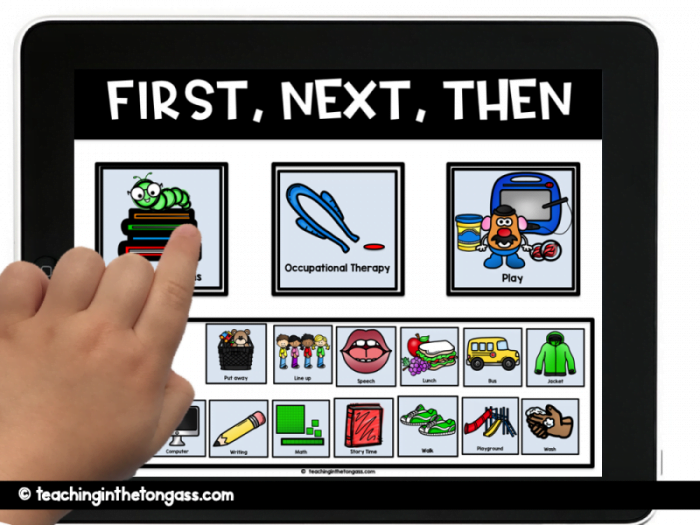
Along the same lines of behavior management, this Digital Visual Schedule is another great tool for individual students. It includes all kinds of slides, like this “First, Next, Then” slide, as well as slides with various times of day (Today, Morning, Afternoon, etc.) and a slide that’s just “(Name’s) Schedule” if you’d rather make each one even more customized. There are tons of digital moveable icons to choose from (I’ve included both home and school icons). You can set up a full schedule for the day, or break it up into smaller parts of the day if that works better for your students.
 Digital Attendance is a great way to allow students to be a part of the attendance puzzle (in case you often forget to do it!). Students just move their name piece to the picture each day and any name pieces left are absent. Use it on an iPad, display it on a projector screen, or even just on a computer. You could have them do this as they enter in the morning, or you could incorporate it into your morning meeting time. It’s up to you and whatever way would work best with your class. The slides include backgrounds for Fall, Winter, Spring and Summer and have editable moveable pieces for each student’s name.
Digital Organization and Parent Communication

This Paperless Teacher Planner comes in both landscape and portrait options, and includes everything from Weekly Planning pages to student checklists to your entire year at a glance. All of those essential teacher planning options in 2 formats: paperless or printed! Yes! You can also print any of the pages, so if you want to do a mix of both paperless and printed teacher binder organization, you can definitely do that.

These Paperless Class Newsletters and Paperless Class Calendars are ideal digital resources because you can save any of the slides as an image or a PDF, and email it to families or publish the saved version to the web. Have families without internet? No problem. You can also print it and send it home to students. Just type your text into the template and save–done! Class Newsletters have never been so easy.
Digital Literacy Activities
I absolutely love these Digital Focus Walls for Reading and Writing because they don’t take up any additional wall space and are interactive digital resources so you can do them with students. Plus, you can save the slide to use the next year if you want (one of my favorite teacher hacks). They each come with tons of moveable icons that make them easy to use and are a great addition even if you already have a literacy program in place.

 These Digital Decodables were created to eliminate the need for printing, cutting, stapling, and storing your decodables (you absolutely can still print these, but you don’t have to). They work great as a center, in small group, for intervention practice, and you can even send home a paper version so students can do another read at home to practice even more (decodables are meant to be read, read, and read again until the sound becomes easily decoded with fluency).
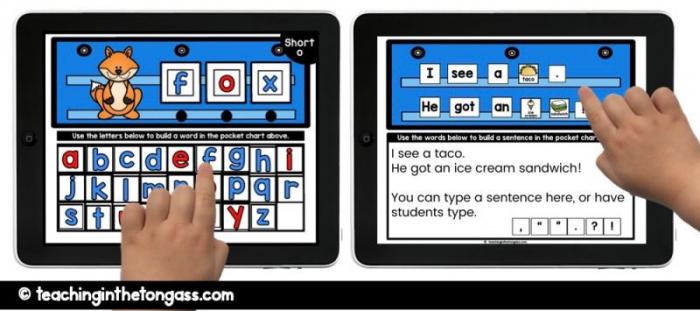
 Digital Word Building is a game-changer. This is just like a word building mat, except you don’t have to cut out any of the letter tiles and none of them can get lost. You can use this activity in a whole group setting with a projector, or you can use it with individual students on tablets or computers. The best part about this activity is that you decide what words you want your students focusing on. If you follow a reading program, this is the perfect addition for spelling and word work practice.
If you’ve ever had a pocket chart center, you know how much students love them. Yet, they can be a pain for you to prep and keep organized…and don’t even get me started on losing the cards. Paperless Pocket Chart Phonics and Paperless Pocket Chart Writing are meant to keep that active engagement piece, while making it easier for you to manage.
Digital Math Activities
 Digital Calendar Math comes with all of the standard calendar math activities you do, from coin counting, to a fun little weather bear slide. It has 13 Calendar Math routines:
-Blank Monthly Calendars (to fill in as you go) with moveable events/holidays
-Yesterday/Today/Tomorrow (with moveable days of the week)
-Month/Season/Weather/Temperature
-Today’s Number (hundreds, tens, ones with moveable popsicle sticks, red straws and base ten piece options)
-Today’s Shape and Properties (with moveable 2d/3d shapes)
-Function (input/output table)
-Today’s Pattern (moveable bears with A, B, C, D labels)
-Counting Coins (pennies, nickels, dimes, quarters)
-Telling Time (blank clock with moveable arrows)
-Hundreds Chart (editable so you can fill in/delete the numbers as you like)
-Number/Number Sentence
-Answer/Problem (open-ended question)
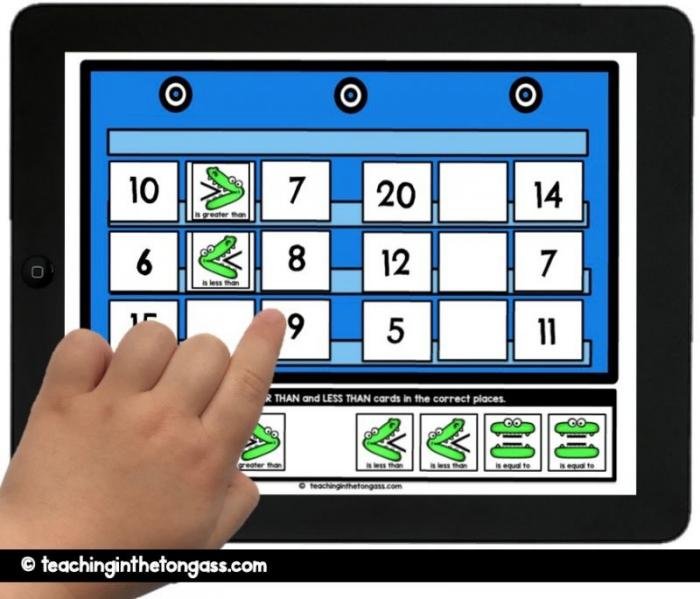
Digital Paperless Pocket Chart for Math is a fun and engaging way to practice and review a ton of different math concepts all the way from making ten, to hopping along a number line, to beginning multiplication and division. And like so many of the other digital activities, this can be used on a tablet, computer or in whole group on a projector screen.
So that’s it! If you have any questions about any of these digital resource classroom activities or want to know more, feel free to leave a comment below.